MENU

test

test
Showing posts with label homeschooling. Show all posts

Monday, March 7, 2016

Our Spring Season Picture Cards

Spring is just around the corner and I’ve been thinking about the activities that the boys and I can do. I was very much inspired by Deb’s post on Spring Season Cards, so I borrowed the idea of printing pictures that relates to spring and we will be using them for the follwing:

  • introducing the season of spring to Vito
  • creating stories using the picture cards
  • inspiration for crafts
  • inspiration for outdoor activities
  • St. Patrick and Easter activities
  • farm animals and their babies
  • animal life cycles

pinayhomeschooler (1 of 1)

Friday, November 27, 2015

How I Make Our Learning Cards

I’ve been wanting to post about this for the longest time but I just couldn’t convince myself to make one.  Anyway, let me share with you the complicated ways I create our learning cards.

So in our homeschool,  there are 3 ways I make our printables:

  • Cards (Montessori cards, matching cards for Vito and seasonal themed cards)
  • Learning booklets
  • Mats and poster diagrams

Basic materials I used:

MAKING THE CARDS

Includes: nomenclature or 3 part cards cards, picture cards, matching cards, history cards, science cards… all cards used in general.

By default I used the combo: 125micron and 160gsm cardstock paper.  This will make the card really sturdy and hard enough for the little one to fold.  I don’t like doing A LOT OF CUTTING so what I do is I laminate then cut.

xxxxx (1 of 1)-61

If I decide to use borders, then I use the combination of HP 80 or 100gsm paper and think pouch. I cut the printed materials then stick it on the colored cardstock using a glue stick.  Then laminate and cut. 

xxxxx (1 of 1)-63

Now, if the thick pouch is not available or too pricey, using a 160gsm cardstock with the thin pouch is more than enough.  The cards will still turn out sturdy.  The only reason why I’m using the 125micron pouch is that they are currently on SALE in AMAZON UK and are MORE CHEAPER than the thinner ones LOL.

xxxxx (1 of 1)-64

MAKING THE BOOKLETS

I’ve started making booklets this year for the boys. I wanted them to last long so I am laminating each pages of the booklets. 

The pages of my booklets are laminated back to back. You can see how its done here on the video of Confessions of a Homeschooler.  I use the HP Inkjet Paper for this one and a 125micron  pouch ( or a 160gsm cardstock and 80micron pouch would do). 

xxxxx (1 of 1)-59

xxxxx (1 of 1)-60

Once they are laminated, I cut and punch holes to form the booklets!  For the cover pages of each booklets, I use the process in MAKING THE CARDS because I want the cover to be harder than the pages.

xxxxx (1 of 1)-66

MAKING THE MATS AND POSTER DIAGRAMS

For the mats and and diagrams, I just laminate them back to back using the thicker pouch and the 160gsm cardstock.  But for best result, better laminate it individually with either a thick or thinner pouch

xxxxx (1 of 1)-65

IF YOU HAVE NO LAMINATOR

When I didn’t have a laminator yet, I just printed my materials on a white cardstock paper and covered them with a contact paper or better yet a transparent tape! Yes, I basically did that when we were in Belgrade.  Worst, we didn’t have white cardstock so I printed my materials in a white paper and glue the paper on the colored cardstock then cover it with tape. 

And that’s just about it!  I hope you find this helpful and NOT CONFUSING LOL. If you have more questions, don’t hesitate to leave a comment, I am more than willing to talk to you for more tips and insights.

Thank you!

Tuesday, May 5, 2015

Layers of the Earth for Kids

I went home one day with a bunch of avocadoes for Vito and I to eat.  Then as I was slicing it, Mavi saw the huge seed inside and blurted out that it looks like the Earth’s core!  And just like that, I whipped a brief activity on the layers of the Earth!

For the book, we had this since 2 years ago that Mavi really really loves to read.  It’s an easy read for young kids and the good thing about it is that it’s like an adventure book that takes its readers into an adventure of digging a hole down to the Earth’s center!  So I am HIGHLY recommending it to those who are interested.

Layer 5

Get the book from:

After looking into the avocado and discussing how it looked similar to the Earth’s layers, I took out some coloured rice (we already have this and stored in ziplocks) and have Mavi create the layers in a piece of cardstock in the way it is described in the book.

Layers 1

 Layers 2

And this is what he came up with. He completed this with a little assistance from me. Well actually, my work only includes getting the rice and beans for him LOL.   He added some space shuttle and man in suit.  The book indicates that it is impossible to reach the center of the Earth as no machines or human can stand the pressure and heat.  But the book allows the reader to imagine and pretend, that if it’s possible, a super duper powerful digger and super suit is needed for humans to reach the  Earth’s core.

And since Mavi is now 6 yrs old, I am “training” him to discuss to me what he has learned from the book.  So he narrated what he learned using his artwork.  Okay, this is like reporting or project presentation in school, but it is at home and you’re doing it with your Mom :D  Mavi actually loved doing it and wanted to do it again!

Layers 3

After which, we took out some stuff at the kitchen and put up together the elements that made up the Earth.  Now, the CRUST is soil (we don’t have any so we used oatmeal for representation), MANTLE is made up of thick hot rocks, OUTCORE is made up of hot molten metal (we used ketchup!) and the INNERCORE is made up of a huge solid metal, a ball of iron (seed of Avocado).

See how spontaneous we are at home! My son enjoyed this activity and so do I! Hope you find this helpful :)

Pin this for later use! Layers of the Earth PIN

Sunday, September 28, 2014

Teaching Addition within 10

Here’s a little recap of what Mavi has learned of our Math lessons for the past weeks.  And  the best part of it is that Mavi has learned how to do mental calculations! Yehey!  I’m so happy that he has discovered this all by himself.  He’s like “I’m using my brains to count Mom”.

addition

We are using Singapore Math workbooks, and we use manipulates as well.  Read here if you want to know how we integrated workbooks and manipulatives. We’ve been using manipulatives for some time (Montessori and other learning materials) and now that he is older, we’re going to use less of these. 

Anyway, here’s what he has learned so far:

Ways to Add

DSC_0255[3]

  • By counting on from the greater number.  This is something new for Mavi.  I told him it’s a trick that he can use to add numbers.  He liked it and he’s been using it ever since. 

Making Addition Stories

Another part of the lesson that Mavi really really love doing was making stories! Favourite characters in his stories were his classmates and the dinosaurs lol.  This is an introductory part for problem solving which we will be doing as we progress.

Next would be subraction. I wonder if he will like it in the same way he did in addition.

Wednesday, September 24, 2014

Calendar: October Schedule

October Calendar

I printed this calendar and posted it in Mavi’s room.  He loves looking at schedules and is looking forward for me to put a star on it once we’ve accomplished something.  So in October our lessons would be:

  • Math:  shapes, ordinal numbers, number and shape patterning
  • Grammar:  First Language Lessons (we will be using Montessori Grammar Symbol for this)
  • ART:  artist study, crafting, random painting activities
  • History:  SOTW
  • Science:  Human body (organs, skeletal system, teeth), plants, natural environment

Tuesday, September 16, 2014

Bright Beaming Toddler Week 2

Mavi is 16 months old.

Theme: Jungle| Vocabulary: Vines| Color: Green| Letter: B | Number: 2 |Nursery Rhyme: The Little Nut Tree

 week2

MONDAY

Theme: Jungle
Vocabulary Word: Vines

The theme for this week is Jungle and the vocabulary is Vines. I introduced to  him the theme by showing pictures of jungles and vines, read a book related to the theme, sing songs and do some activities related to the theme.  Per usual, Mavi immediately got excited seeing the pictures.  He pointed out to the written words and tried identifying the letters all by himself.  It's just confusing to teach him the vines versus the jungle by just looking at the pictures  because I mistakenly printed out similar pictures of jungle and vines, plus they're all green!  I should have printed out a more discreet picture of the vines.

Anyway, he can properly say "vines".. as in "vayyynnnns" but he didn't manage to say jungle correctly, he's version was "dader".

01b095f89c7814df4c06265f09c7c669

Months ago, husband and I were able to buy the book "Just Like Me".  It was on sale, so instead of 1k rsd, we bought it for 500rsd only.  I used this book as my tool of teaching him the Jungle.  It's about an armadillo, lost in the forest and is looking for something that looks like him.  He likes this because it's a look and feel book and he loves to rub his fingers on the photos' surfaces.

IMG_0864_picnik copy


TUESDAY

Shape: Green
Up until now, I find it difficult to teach Mavi about colors.  I don't know if he can understand it yet because he doesn't respond that much . I mean, he can point at the colors I'm asking him first, then the second time around, he will miss out.

IMG_0865 copy

To introduce him to the color green this week, I first tried to show him my cut-out of leaves printed in green art paper.  Then I started to put glue into it and demonstrated to him the proper way of putting it in the paper.  But he wasn't interested on the leaf or on the gluing activity.  Instead, he finds the glue stick more fascinating and he  took it away from me.  He played it for the rest of the day, and gets mad if I ask for it.

color the square

When he was already calm, I attempted again on teaching him the green color by showing the square shape that we have on our previous lesson.  When I have his attention, I showed him the green colored pen, the green colored-crayola stamps and the green crayon.  I told him "Mommy will color the square GREEEEN".  Then I started putting stamps on the square and shaded it with a green crayon. Enticed, he took the stamp from me and started tapping the paper with the stamp.  Sadly, the stamp was too small, I expected that it would produce a larger and more visible stamp, but it's too small and so light that Mavi can't barely see the effect if he taps the paper with the stamp.  When he was tired, he took the crayon and started doodling on the square.. and on the table as well.

Desktop7_picnik copy

This is what he loves to do most, removing the cap from the pen or glue stick and putting it back again.  He keeps doing it again and again, somewhat fascinated and that he can do it by himself.  I allowed him to do it anyway, so he can practice his hand and eye coordination.  I tell you, he's really good at it.

Desktop5_picnik copy

We also did "find a green color object" activity.  We looked around the house for toys and objects that's colored green.  Everytime we see one, I would say "green car", "green cup" etc.  Then we collected those objects and put it in the paperbag.  Since he likes car, I also cut out  square shapes from a piece of green art paper and constructed a car.  He doesn't like pasting the squares on the paper, but he loves the end product... green car.  Even if I use stickers, he doesn't know how to paste the on a surface yet. . Hmmm, I wonder why.  And I wonder how I  can teach him to do that.

Wednesday

Letter: B
IMG_0864 (2) copy

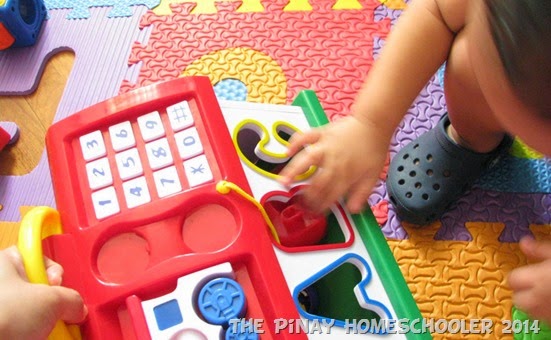
Letter B was introduced and I didn't print the letter, I just wrote it and made him trace the letter with his finger.  He already knows the letter so teaching him was not that difficult. Same thing as letter A, he matched the right hole for the letter B by successfully dropping the letter B on it.

Desktop8_picnik copy

Since we still got enough time, we read his favorite Nursery Rhymes book and ask him to identify the letter B on the writings.  So far, he's doing well with the letters because he didn't miss any.

Thursday

Number: 2
As I mentioned earlier, to prepare for this lesson, I printed out two sets of matching frogs and clover leaf pictures on a piece of green colored art paper.  I put numbers 1 and 2 at the center of the picture.  These actually have dual purpose, first that is for counting, and then the other for our matching game.

IMG_0786_picnik copy

When I showed it to him, he was amused.  I showed to him the frog in sequence, "1 frog", "2 frogs"... "1, 2". In effect, he keeps on pointing at the numbers and saying it out loud. After I while, I tried showing to him that we can match the two items.  I demonstrated this by placing the two frogs together at one side of the table and the clovers on the other side.  Unfortunately, he couldn't get the idea.  This is the first time he encountered a matching game so I know that he couldn't grasp the thought at first.  I kept on pairing the frogs and the clovers... but he just grabbed the frog and run away shouting "2!" "2!".

IMG_0783_picnik copy

That afternoon, after his nap time, we draw the number 2 on a piece of paper.  I let him held the colored pencil and moved his hand to draw the number 2.  Then I cut out small squares on a piece of green sticker and instructed him to paste it on the paper below the number.  I peeled the sticker; put it on his finger indicating that he should paste it on the paper.  I guided his fingers while he put the sticker, and then we counted "1 square", and then followed by the second square "2 squares".  When we were on our last number 2, he immediately run to his other days and doesn't want to do the counting activity.  He definitely doesn't like the sticking activity and he still has difficulty in pasting the stickers.


Friday

Nursery Rhyme: The Little Nut tree
I posted the rhyme on our learning wall, and I kept on reciting it to him every time he plays around the house.  He keeps on pointing to the tree picture that I put beside the poem.  He's not much into the poem, even on the previous poems that we've been reading.  I think the reason for this is that there's not much picture or colors on the printouts that made.  Mavi usually prefers a book and sad to say, English books are scarce in this country :-).

We didn't do any motor skill today for I was not feeling well. Mavi just spent the day doing free-play.  Still, I wasn't able to plan for motor skills activity because I didn't have the time to prepare.  Hopefully by next week, I will be in the mood to do some fun activity with him.

Monday, September 15, 2014

The Geological Times


DSC_1326

By now, you all know that my son is into history … the beginning of times.  I’m thinking of feeding this current interest and I find myself introducing topics which are unplanned.

I’m so thankful that I purchase The Universe Series (Trilogy) by Jennifer Morgan.  This book series tells the story of time, starting from the big bang theory (cosmology).. followed by the first animals and dinosaurs and the last book is about how the mammals that survived morphed into human beings.  The book is engaging (my son is only 6!) yet he reads this book on his own.   Amazing amazing book. All those science concept were explained in such a way that little fellows can understand as well. 

DSC_1306

I got my books from Book Depository.  I find that it is much cheaper there, and ships for free worldwide.  The books are:

So we used these books to study the geological times.  We read them over and over, noted the import events and arranged them according to the period in time.

 DSC_1252 DSC_1259

Information about the pictures:

HADEAN,ARCHEAN, PROTOZOIC--I used my felt planets to represent the events of the formation of the solar system (moon, planets, stars)

PALEOZOIC (early life) –- we placed Dimetrodon, appearance of first insects, amphibians, rocks

MESOZOIC –- time of the dinosaurs

CENOZOIC – evolution of humans

DSC_1338

 DSC_1341

How I wish I have the Safari Toob Cambria Life and Safari Toob Prehistoric Life to make our time line much more interesting.  Maybe in another, if I have the budget :)


Follow Pinay Homeschooler's board Science on Pinterest.

Linking to:

Montessori Monday
TGIF Linky Party
Teach Beside Me
Preschool Corner
Teaching Mama
I Can Teach My Child
Home + School = Afterschool!

Thursday, September 11, 2014

Dinosaur and the Land Before Time

dinocollage

My son is obsessed with dinosaurs. Majority of the books he borrowed from the library is about dinosaurs.  His birthday cake was decorated with dinosaurs. So when he begged that we’ll play with dinosaurs, I couldn’t resist.  At the same time, Mavi’s favourite books are the ones in Life to …. He reads it every night and is eager to learn all about the beginning of times.  So considering all the factors, I put up an afterschool learning activity about the geological times and the era of dinosaurs.

Here are the activities we worked on…

Geological Time  

me-28 This topic deserves a separate post.  But here’s a preview of what we did here. My son is obsessed with the books that you see in the picture.  It is a three book series which tells the story of the beginning of time, from the big-bang to the appearance of humans.  Now, using these books we traced the geological period from the creation of the stars and planets to the first humanoid.

Dinosaur Family Tree

me-19

Another topic which I will have a separate post as well.  My son’s fascination with dinosaurs started this year and so far he has memorized the names of all the dinosaurs that appeared in the books which I shared at the very end of this post.  He’s been watching Walking With Dinosaurs non-stop and Dinosaur Train.  He wants to be a paleontologist and would make videos of dinosaur stories.

With this “burst” of interest, I’m gave him a challenging task of forming the Dino-Family tree using the cheat-sheet and our dinosaur figures.

Periods of the Dinosaur

me-24

We’ve done this activity a couple of times but I always add it whenever we re-visit dinosaur study.  For this year, the focus was for him to tell the difference between the three periods (time and the characteristics of dinosaurs living in that period).

Learning About Dinosaurs

me-25  I made a new set of cards for him (he requested this).  I previously made him this, but he wanted to have a new one.  The images where from BBC Walking With Dinosaurs and all the information in the card were from Enchanted Learning.  The are only 8 dinosaurs in this set that I made because I fell sick but I plan to add some more when I see beautiful images of other dinosaurs in our figures.

  me-26

You can get with activity sheet (fact sheet) from here. I made this so I can train Mavi to “record” information of his dinosaurs.

     DSC_1231 DSC_1239

Currently, our dino collection is composed of Safari Toob Dinos and Safari Toob Feathered Dinosaurs. 

Dinosaur Fossils

I got Mavi an air dry clay from the craft store and we made dino fossils.  This was a fun activity for both of us as we are trying to make the “best looking fossil ever”.  I realize that it was actually hard to make a realistic dino fossil LOL.

DSC_0979

When they dried up, I made Mavi paint the fossil light brown to make it similar to those in the museum.

DSC_1183

But he had plans of his own :)  According to Mavi, the blue ones where fossils discovered in water, the red in volcanoes, the green and yellow in mountains and the brown ones were excavated from he ground.

DSC_1203

 Parts of a Volcano

me-22

Since volcanoes were pretty active during the time of dinosaurs, I added parts of a volcano in our lesson. This one is from Montessori Print Shop.

me-23 Volcano Experiment

And for the most exciting part…. volcanoes and dinosaurs in one gigantic eruption!   

DSC_1313

Books

Will prepare a separate post for the books.

More activities in my Pinterest Board Follow Pinay Homeschooler's board Dinosaur Theme on Pinterest.

Linking to:

Montessori Monday
TGIF Linky Party
Teach Beside Me
Preschool Corner
Teaching Mama
I Can Teach My Child
Home + School = Afterschool!

Sunday, August 31, 2014

Learning About East Asia

East Asia

If you’ve been following my blog, we started our Asia Unit last month and so far we successfully completed our Southeast Asia Study.  In this post, I present to you materials and activities we worked last week for East Asia. 

Maps and Flags

As you all by now, we ALWAYS start our continent/country study with maps and flags.  This will familiarize the child of the subject’s location and each of the country’s national symbol.  For the East Asia, we identified three major countries: China, Japan and South Korea

Materials:

DSC_0930i

Again, we used Lego to recreate flags.  This activity is similar to our Southeast Asia flag activity.

DSC_0920i

Famous Landmarks

We have painting/crafts activity and Lego play.  Our tablet is very useful for this activity.  We used it to view pictures (for clear view) and watch videos related to our study. 

Materials

Famous landmark for Japan is Mount Fuji

           DSC_0848 DSC_0914 

 DSC_0931i

We chose Great Walls of China as our subject here.  Here we use our fact cards, which Mavi reads while we view the bigger picture in our tablet.

DSC_1031i

Calligraphy

We are using the Japanese numbers in this activity.  I painted the characters on papers and cut them for presentation.  Now Mavi has to make the characters as well.

DSC_0996i

After the activity, Mavi was like “Mom it is so difficult!”. 

DSC_1012i 

Animals

We’ve studied Asian Animals previously, so in this activity we’re doing a Panda puzzle.  I printed this from DLTK Kids, and Mavi has to color and form the Panda according to the cheat card.

DSC_0959i 

Arts and Crafts

We made oriental fans and learned how to make origami items.  For the oriental fans, we used paper plates, used watercolor for the background and black tempera paint for the details.  Our origami papers are homemade because the real ones are so expensive in this side of the world.  They’re colored crafts paper and I cut them to a size of 6 x 6 inches.

DSC_1037i

DSC_1008i

Books

We used lots of books, but here are my son’s favourites [aff.links]:

DSC_1034i

For more Asia Unit please check my Pinterst Board Follow Pinay Homeschooler's board Continent Study: Asia on Pinterest.

Linking to:

Montessori Monday
TGIF Linky Party
Teach Beside Me
Preschool Corner
Teaching Mama
I Can Teach My Child
Home + School = Afterschool!
History and Geography